












How to Install a Glueless Lace Front Wig in Under 5 Minutes
Installing a lace front wig does not have to be complicated or time-consuming. If you want a quick everyday routine without glue, a glueless lace front wig can make getting ready much easier. Here is the step-by-step process: Step 1: Check the Wig Before Putting It On
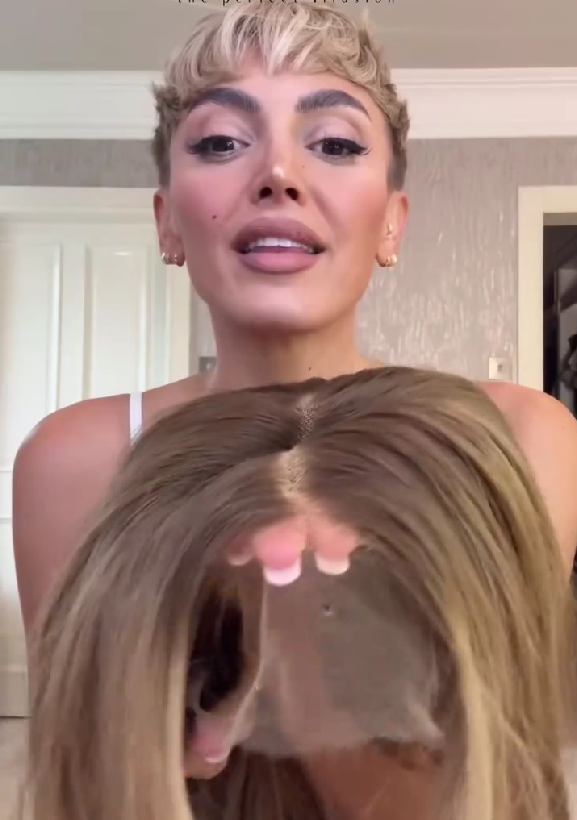
Begin by showing the inside of the wig and the lace construction. Before installing your wig, take a moment to make sure the cap is sitting correctly and that the hair is not tangled around the inside. For a glueless installation, the fit of the cap is especially important because the wig needs to sit securely without relying on adhesive. Adjust any straps or internal features before placing the wig on your head. Step 2: Place the Wig on Your Head
Position the wig carefully and bring the lace forward towards your natural hairline. Make sure the centre part is sitting where you want it and check both sides before continuing. A glueless wig should feel secure but comfortable. You should not need to pull it excessively tight to keep it in place. Once the wig is positioned correctly, gently smooth the hair away from the face so you can see the lace clearly. Step 3: Clip the Hair Away From the Hairline
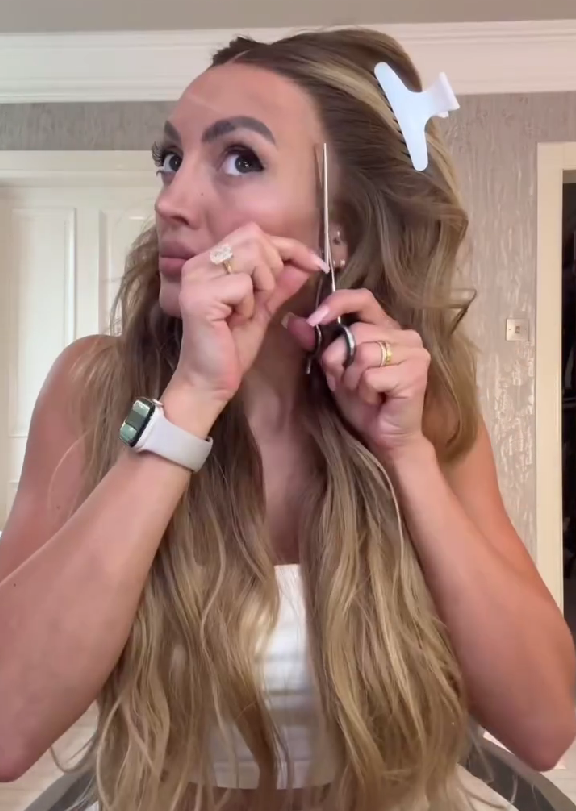
This is an important little step because it keeps loose strands away from the scissors and makes the lace much easier to work with. Use small hair clips to hold the hair back around both sides of the face. This gives you a clear view of the lace and helps reduce the chance of accidentally cutting any hair. Step 4: Trim the Excess Lace Carefully
Once the wig is positioned correctly, the excess lace can be trimmed. Take your time with this part. Small, controlled cuts generally make it easier to follow the natural shape of the hairline. Avoid cutting too close to the hair itself. You want to remove the visible excess lace while leaving the hairline intact. If you are wearing the wig for the first time and are unsure, trim a little at a time. You can always remove more lace, but you cannot put it back once it has been cut. Step 5: Check the Hairline
After trimming, check both sides of the lace front in the mirror. The lace should sit softly along the hairline without large pieces extending onto the forehead or around the ears. Because this is a glueless installation, there is no need to apply wig glue to complete the look. This is what makes the routine so convenient for everyday wear. Step 6: Style the Front Sections
Once the lace is trimmed, the video moves straight into styling. The front pieces are smoothed and shaped using a heated styling tool. This helps the hair sit naturally around the face and gives the wig a more polished finish. You do not need to completely restyle the wig each time you wear it. A few quick adjustments around the front and parting can often be enough to refresh the whole look. Step 7: Finish the Parting
The Reagan wig in the video is styled with a centre part. A clean parting can make a big difference to how natural a lace front wig looks. Gently smooth the hair on either side of the part rather than flattening the entire wig. The aim is to create a natural shape with a little movement rather than making the hair look overly perfect. Why Glueless Lace Front Wigs Are So Easy to WearOne of the biggest advantages of a glueless wig is how quickly it can become part of your everyday routine. There is no need to wait for layers of adhesive to dry or spend a long time removing glue at the end of the day. Once the lace has been prepared, you can simply put the wig on, check the fit, make a few styling adjustments and go. This can be particularly useful if you wear wigs regularly, have a sensitive scalp or simply prefer a lower-maintenance routine. Do You Need Glue to Make the Hairline Look Natural?Not necessarily. The natural appearance of a wig depends on several things, including the quality of the lace, the density around the hairline and how well the cap fits. A well-fitted glueless lace front can still create a soft and realistic-looking hairline without adhesive. The key is making sure the wig is positioned correctly and that the lace has been trimmed carefully. The Reagan Glueless Lace Front WigThe Reagan style shown in this tutorial has a long, softly layered look with dimensional blonde tones and a natural centre part. The transformation is very simple: position the wig, trim the lace, smooth the front and style. That quick process is exactly why glueless lace front wigs are so useful for anyone who wants a polished finish without turning wig installation into a lengthy routine. Tips for a Faster InstallationOnce your lace has already been trimmed, future installations should be even quicker. Keep the wig stored properly between wears so the parting and overall shape stay neat. Gently detangle the hair before putting it on. Adjust the internal fit before you start styling. Keep a couple of clips, a comb and your preferred styling tool nearby so you are not searching for products halfway through your routine. Most importantly, avoid overworking the wig. If the hairline and parting already look good, only style what actually needs refreshing. Final ThoughtsA glueless lace front wig can be one of the simplest ways to achieve a natural-looking hairstyle without a complicated installation. As shown in the Reagan tutorial, the process can be as straightforward as positioning the wig, clipping the hair back, trimming the lace and lightly styling the front. Once your lace has been prepared, the everyday routine becomes even faster. For anyone who wants natural-looking hair without spending a long time getting ready, glueless lace front wigs offer a practical and beginner-friendly option. |